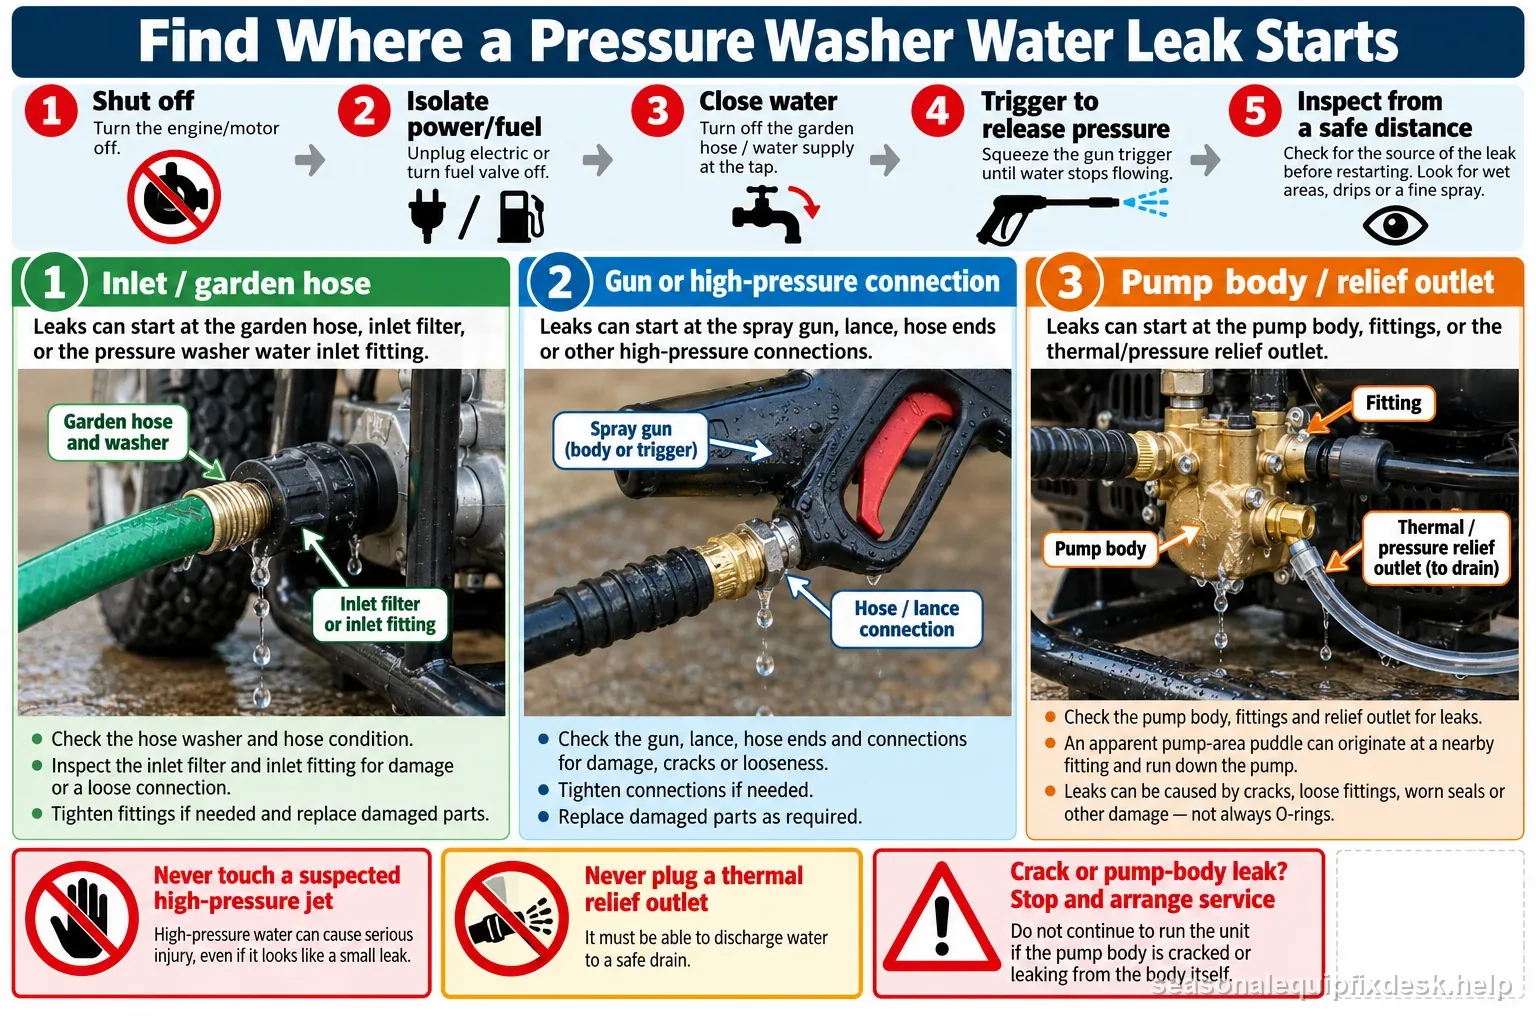
Quick answer: Water near a pressure-washer pump can come from the garden-hose inlet, a pressure fitting, the thermal relief valve, an internal seal, or a cracked pump. Identify where water first appears and when it appears before ordering parts. Shut the washer off, isolate power or fuel, close the supply, release pressure at the gun, and let hot parts cool. Never use a hand to find a leak or run the machine close to a suspected high-pressure jet.
A pump leak can explain lost pressure, but a weak spray can also come from an inlet restriction or trapped air. See the pressure washer no-pressure sequence before assuming an internal fault.
| First wet point | Possible source | Safe response |
|---|---|---|
| Garden-hose inlet | Washer, adapter, or inlet seal | Shut off water; inspect cool connector |
| High-pressure fitting | Connector or hose damage | Relieve pressure; replace damaged hose |
| Small relief outlet | Thermal relief or bypass heat | Stop extended idle; follow manual |
| Pump body or seam | Seal, plunger, freeze crack | Stop; pump service provider |
Find the first wet point without approaching a pressurized leak
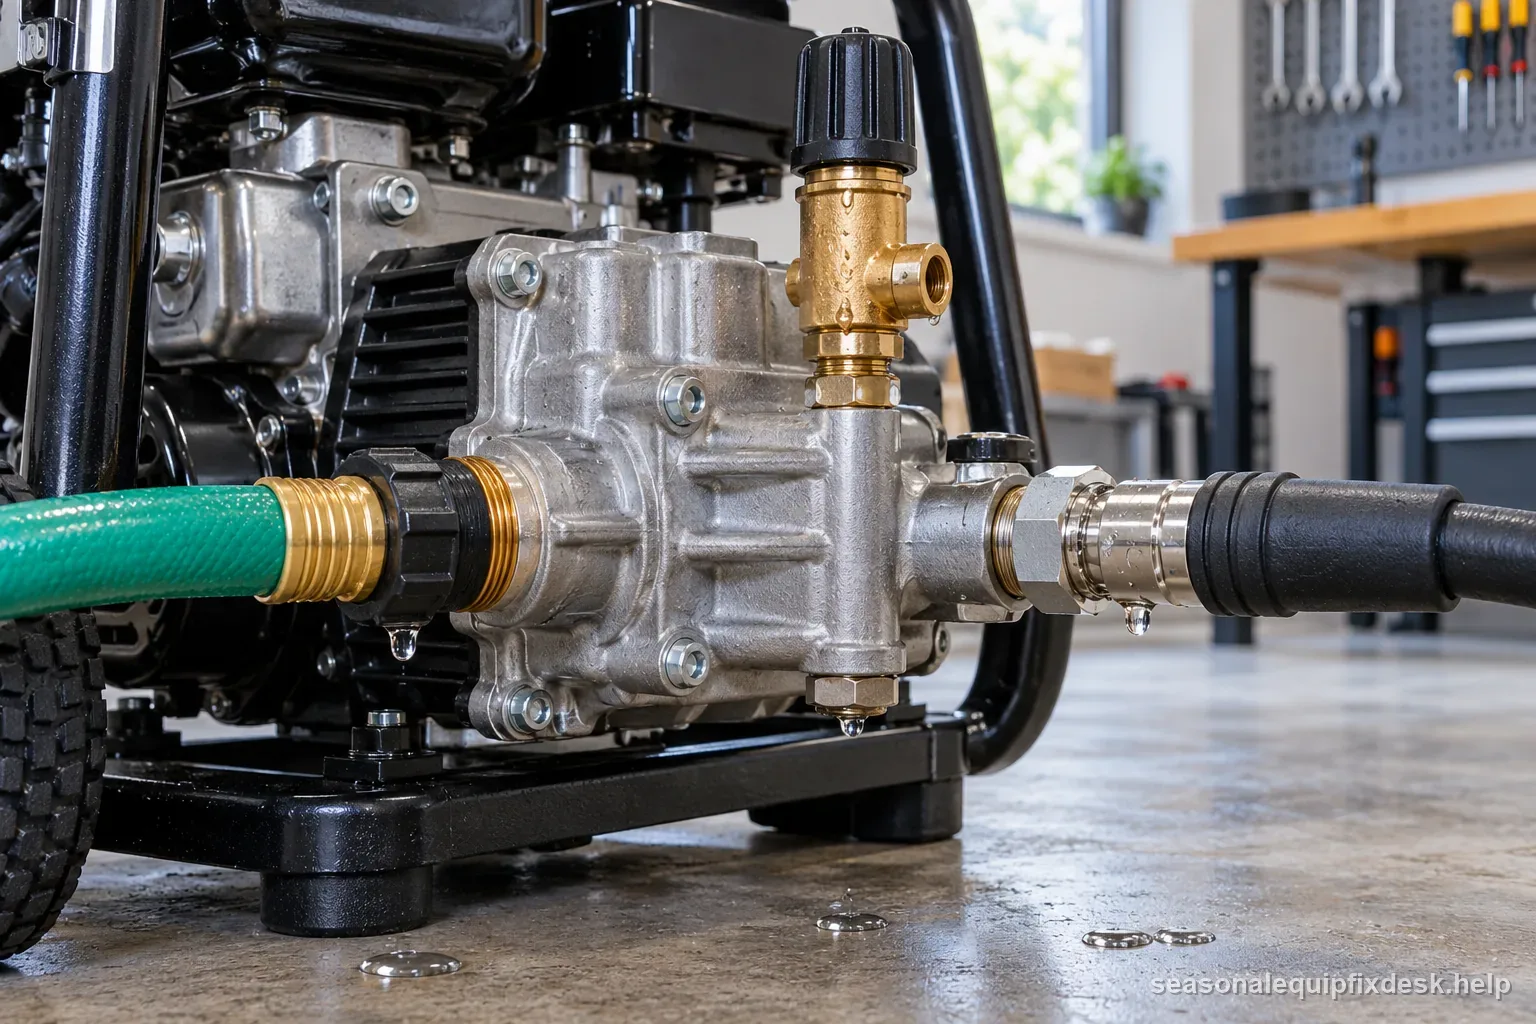
Do not run the washer to make a suspected leak appear. First switch it off, disconnect electrical power or stop the engine, close the water supply, squeeze the trigger to release trapped pressure, and let the pump cool. From a safe distance, look for dried water or mineral trails at the inlet, outlet, thermal-relief outlet, pump body, or manifold seam. A few drops from the wand after shutdown can be residual water; a steady stream, a crack, or water near electrical parts needs a stop-use response.
If the origin cannot be identified while the machine is isolated, have a qualified service provider inspect it. Any manufacturer-approved live operating test belongs to the exact manual and must be performed without placing a person near the pump, hose, or spray path.
| Where water first appears | Likely path | Owner-safe direction |
|---|---|---|
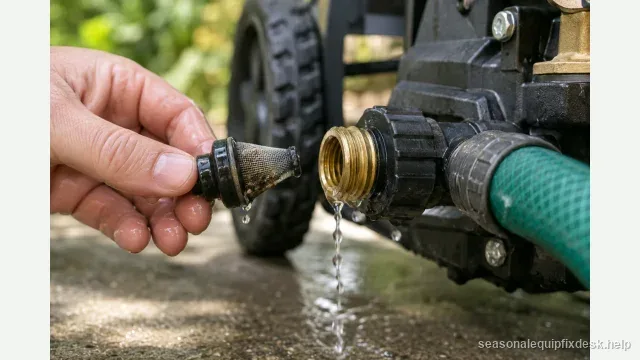
| Garden-hose inlet before motor runs | Washer, inlet fitting, screen housing, or thread seating | Shut water off; inspect the cool, depressurized connection and replace damaged external parts |
| High-pressure outlet or hose joint | Connector O-ring, hose end, or pressure fitting | Stop, trigger to release pressure, and replace only the exact pressure-rated component |
| Small thermal relief outlet after long idle bypass | Pump water overheated while not spraying | Stop the engine/motor between use; never plug or disable the relief valve |
| Pump body, manifold seam, or crack | Internal seal, freeze damage, or structural failure | Stop use and follow the pump maker’s service/replace guidance |
Inspect external seals only after locating the leak
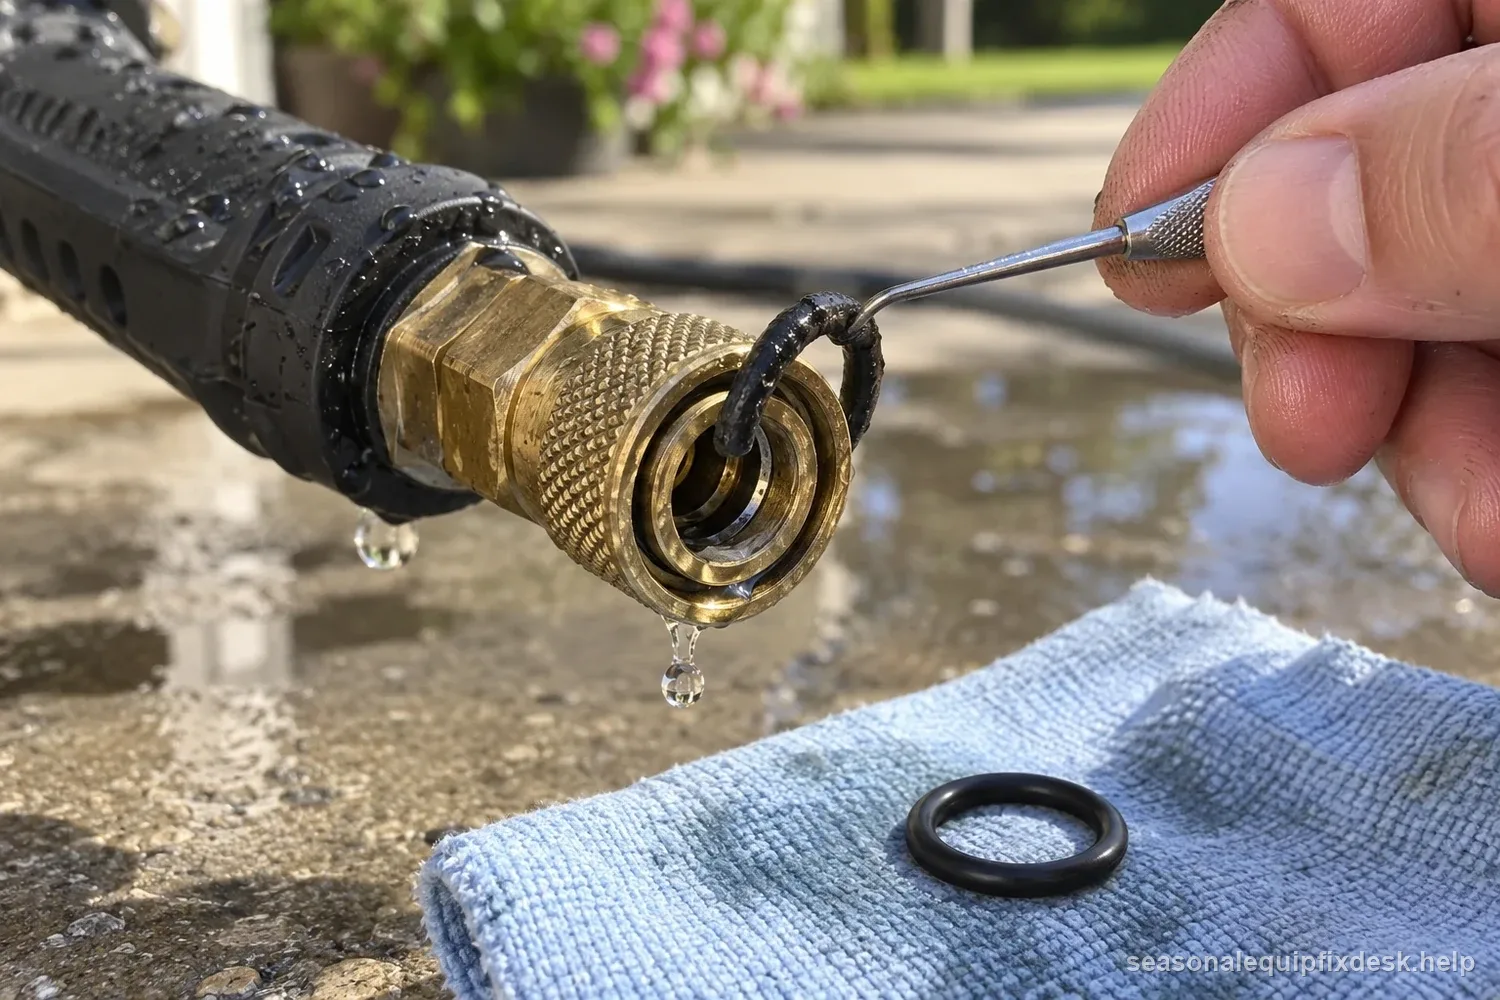
A damaged O-ring is one possible source at a connector, but a puddle under the pump does not identify the failed part. Water can travel along a hose or casting before it drips; a pump-body seam, relief outlet, or high-pressure hose needs a different response. Inspect or replace a connector seal only if the exact owner’s manual treats that fitting as serviceable, and use the specified part and procedure. If the manual does not describe owner service, stop and contact the manufacturer or service provider.
Do not touch or patch a pressure hose
With the washer depressurized and cool, inspect the hose visually for cuts, blisters, exposed reinforcement, abrasion, kinks, or wet areas. Never slide a hand along a hose, even after shutdown, and never patch a damaged high-pressure hose. Replace a suspect hose with the exact pressure- and temperature-rated part specified for the washer.
A thermal relief valve and unloader are not homeowner adjustment points
A small valve may discharge water when a pump overheats after running in bypass, but repeated or continuous discharge still needs investigation. Identify the component from the model diagram; do not plug, clamp, remove, or adjust a safety valve or unloader to stop a leak. Follow the manual’s stop-and-cool procedure and arrange service if the valve leaks while cool or under normal operation.
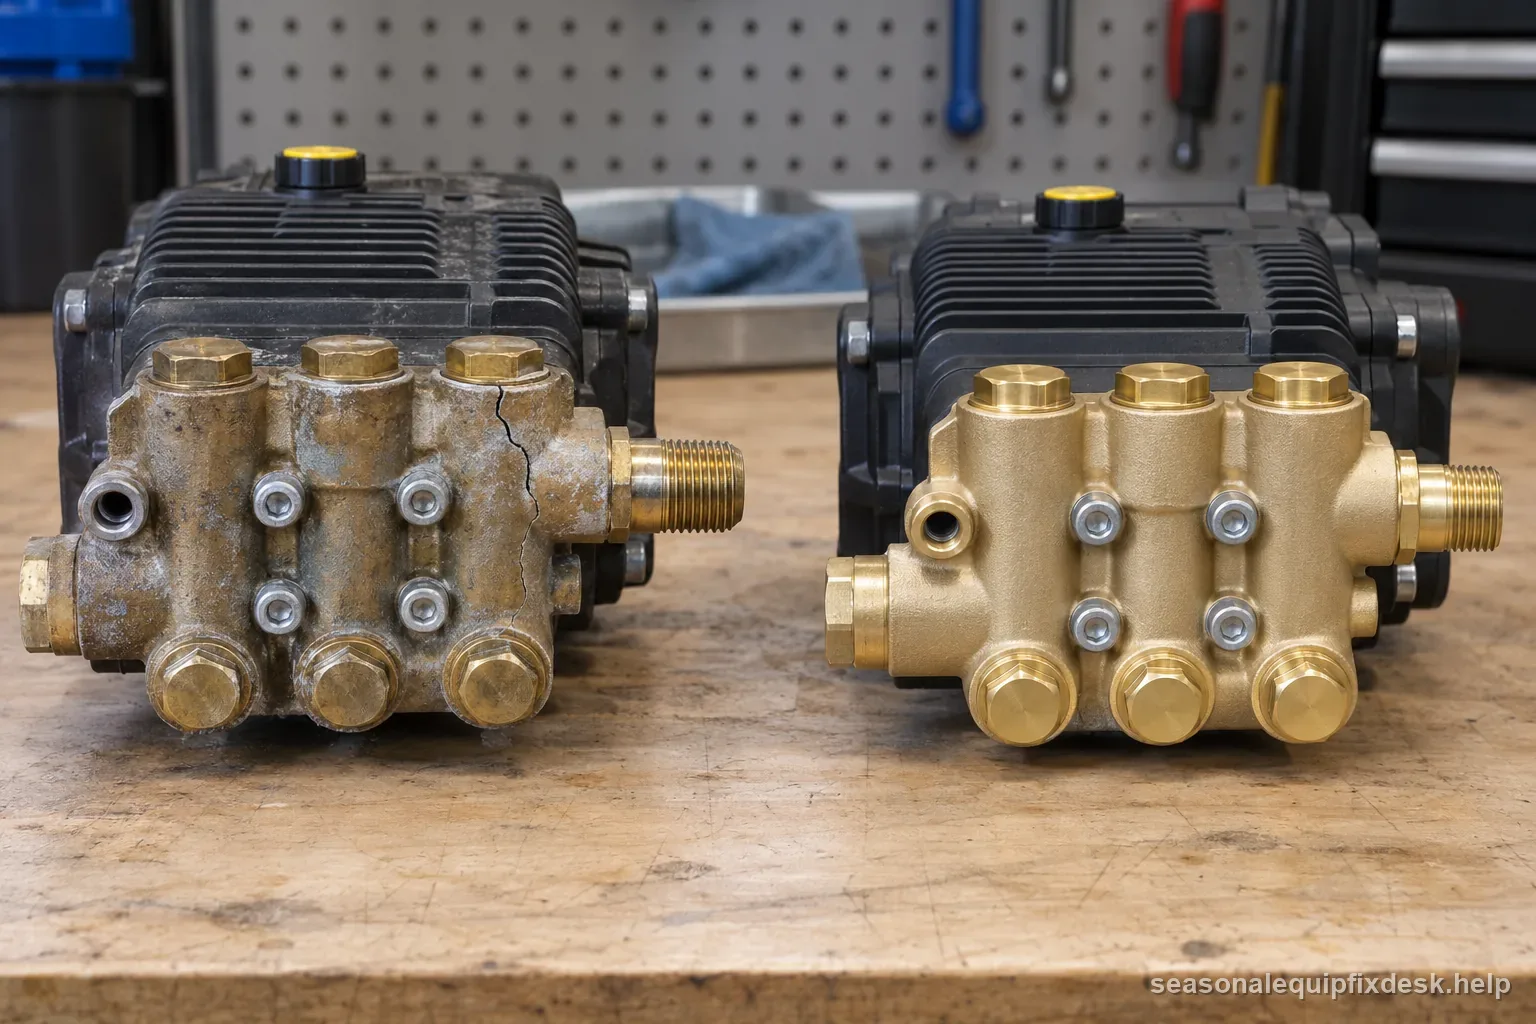
Water from the pump body, manifold, or engine-pump seam may indicate internal seal damage or a cracked casting. A crack in a pressure-bearing part cannot be repaired with sealant; stop using the machine and follow the pump maker’s service or replacement instructions.
Freeze damage is a leading cause for seasonal equipment
A pump that was stored with water still inside it and experienced a hard freeze can develop internal cracks from the expanding ice, which shows up as a leak (or a complete no-pressure condition) the next time the washer is used. This is exactly why the site's winter-storage guide emphasizes fully draining or running pump antifreeze through the system before cold weather — a leak that appears at the start of the next season, on a washer that worked fine when it was put away, deserves a check for this specific cause.
- Switch off and isolate power or fuel; shut the water supply.
- Squeeze the trigger to release trapped pressure, then let a hot pump cool.
- Dry the exterior and inspect visible connections without placing hands near a suspected jet.
- If the manual permits, restore water with the motor still off and observe from a safe distance.
- Stop at a cracked body, high-pressure spray, or water near electrical parts; arrange service.
A short, safe repair-order checklist
- Turn the machine off; disconnect electricity or stop the engine, close water, release trigger pressure, and let hot components cool.
- Inspect visible water trails from a safe distance and record the first wet point without touching it.
- For an inlet or outlet connection, check the exact manual for user-serviceable washers or O-rings and depressurize fully before replacement.
- Replace a damaged pressure hose; never patch it.
- Stop and arrange service for a thermal valve, internal pump leak, crack, water near electrics, or uncertain origin.
- Retest only by the manufacturer’s procedure after all covers, connections, and safeguards are restored.
Separate wand drainage from an active pump leak
A small amount of water may drain from the wand tip after use. That does not explain water repeatedly emerging from the pump body, manifold, or a pressure connection. Record the location and timing. Treat recurring pump-area water, a steady drip, or any crack as a fault until the exact source is confirmed.
Replace a seal only when the manual supports owner service
Before installing an O-ring, fully isolate and depressurize the washer and confirm the exact part number, size, material, and pressure/temperature rating for that model. Inspect the sealing groove only when the manual identifies it as owner-serviceable. Do not assume a generic O-ring kit or lubricant is compatible with every pump. If the pump requires internal disassembly or the correct part cannot be identified, use authorized service.
- Identify the washer model and pump type from its label or manual.
- Check whether the manual lists the connector, seal, or pump as owner-serviceable.
- Replace a damaged high-pressure hose; never patch it.
- Stop for a cracked pump body, repeated relief discharge, or leak near electrical parts.
The exact model manual and pump maker determine which parts are owner-serviceable.
Electric versus gas pump construction changes what's practical to fix
Most consumer electric pressure washers use an axial cam pump with plastic or composite internal components, which keeps the unit lightweight and inexpensive but generally makes an internal pump rebuild impractical — on these units, a leak traced past the accessible O-rings and into the pump body itself is usually more economical to address with a full pump or unit replacement than a component-level repair. Gas pressure washers more commonly use a triplex or axial pump with metal internals built for a longer service life, and these are more often designed with a genuine repair path in mind, including replaceable seal kits and, on higher-end models, individually serviceable valves. Knowing which category your washer falls into before spending time chasing an internal pump leak saves the frustration of discovering, after the fact, that the specific part needed either isn't sold separately or costs close to a full replacement unit.
Before committing to any pump-level repair or replacement, it's worth comparing the cost against a new complete unit at the lower end of the price range, since consumer electric pressure washers in particular are often priced close enough to a pump-only replacement part that a full unit swap ends up being the more practical choice once labor time is factored in, even for someone comfortable doing the repair themselves.
Gas models generally justify the repair math more often, since their metal-bodied pumps carry a meaningfully higher replacement cost relative to the price of a seal kit, making the O-ring or unloader-valve fix described above the clearer financial choice on that category even when the same underlying question is worth asking on any pressure washer before ordering parts.
A pump leak and a no-start can coexist; use the safe engine-start branch and keep the unit off if fluid or fuel is leaking.
For the matching drive or fuel symptom, see pump leaks that appear alongside pressure surging.